In this article
Creating an email template
- Open a new email in Outlook
- Write the email you wish to create a template from. Format it how you want, give the email a subject and if required include any standard attachments that you need.
- Click the Save as email template button and enter a name for the template.
- The new email template is created and can now be used
Creating a new email from an email template
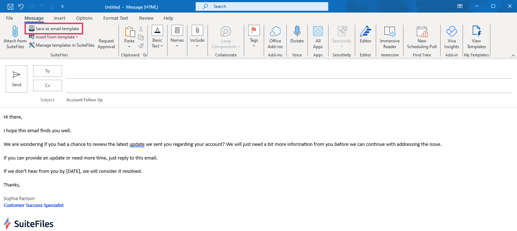
- Open a new email in Outlook
- Click the Insert from template button and choose the template from the list

- If your SuiteFiles site is connected to the Xero Practice Manager (WorkflowMax) or MYOB Practice Management/GreatSoft you will be prompted to choose a client name and populate the email template with data about that client. If not required click Don’t Prepopulate.
- The new email is created and can be tailored before sending.