To save an email when you send it you need to make sure you have the setting enabled:
- Click the gear icon in the top right corner of the SuiteFiles Outlook add-in
- Select Manage settings
- Tick the 'Prompt me to save on send' box
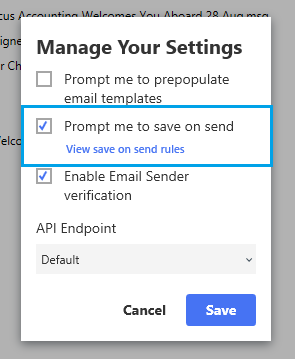
- Click Save
- In Outlook, create a new email to send
- Click Send
- The 'Do you want to save this email?' screen will appear. From the drop-down list, select which folder you want to save the email into. If the folder isn't showing in the list, click the Edit button to bring up a location chooser that will let you navigate across all folders in SuiteFiles
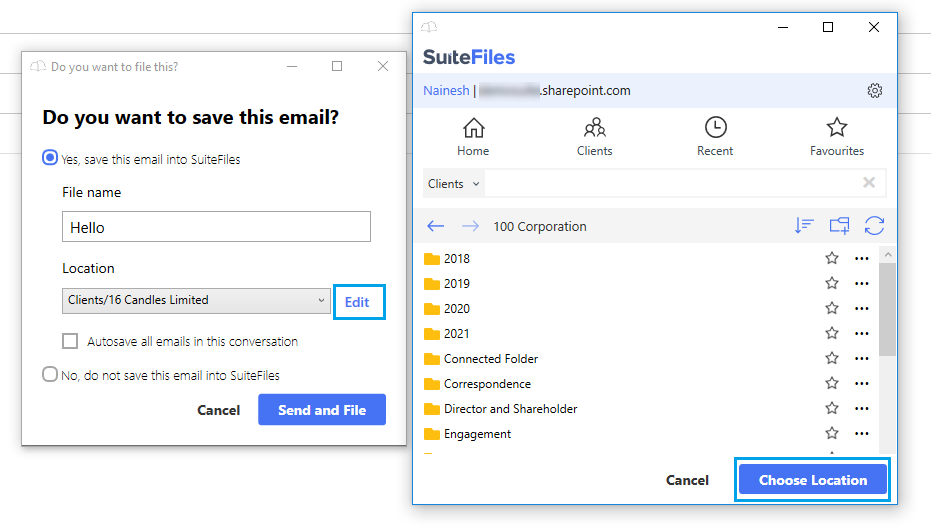
Please note that when you first use the save on send function, the location might be blank. To change this, click 'Edit' to choose the location you want to save the email to.
- Give the file a different name if you wish
- The 'Autosave all emails in this conversation' check box will be selected by default. Keep this selected if you want all emails in this conversation thread to be automatically saved into SuiteFiles.
- Select 'Send and File'
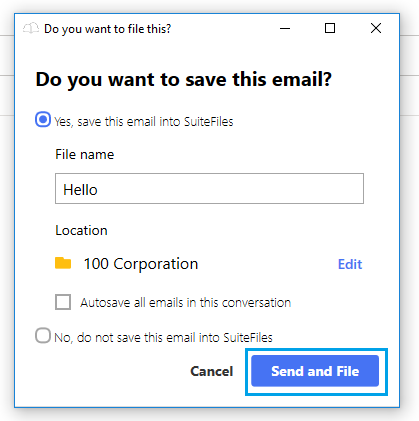
- Your email will be saved into SuiteFiles, and categorised in Outlook as 'Added to SuiteFiles'.
Please note you can also choose to select 'No, do not save this email into SuiteFiles' if you want to send the email, but don't want it to be saved into SuiteFiles.