In this article we will step you through
More ways to connect
You can continue to share folders with your clients via the vertical ellipses menu or the breadcrumb dropdown menu.


We've added a new button to Share to Connect when you have a folder selected

Connect Wizard
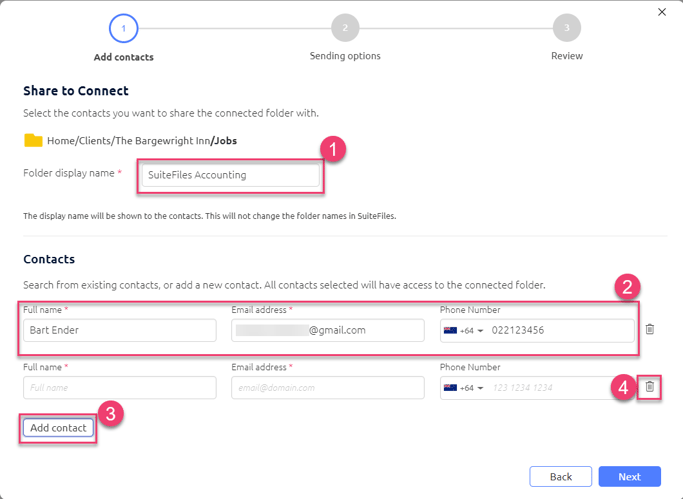
1. Create the folder name you want your clients to see.
2. Either manually enter your clients name, email address and phone number or start typing in the name field and a contact drop down will suggest clients from your integration.
3. Click to add additional contact fields to share to more contacts.
4. You can click this to delete a contact.
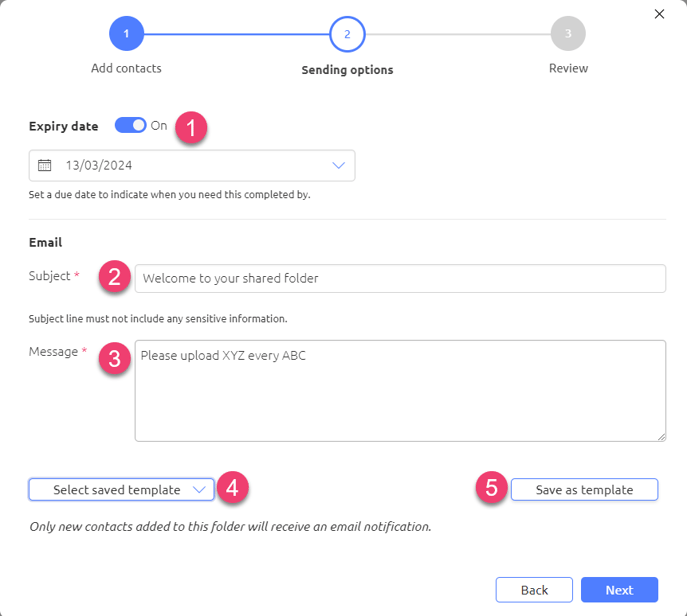
1. You can toggle whether or not your Connected folder will have an Expiry date.
Note: When Expiry Date is toggled On it will default to a 30 day expiry. You can adjust this date to a maximum of 365 days.
2. Customise the subject line of the email notification your clients will receive containing to link to their Connected folder.
3. Customise the contents of the email to the client.
4. You can load any saved template to prepopulate your subject line and message with a template you've saved previously.
5. Save as template to preserve the current subject line and message for reuse as a template..
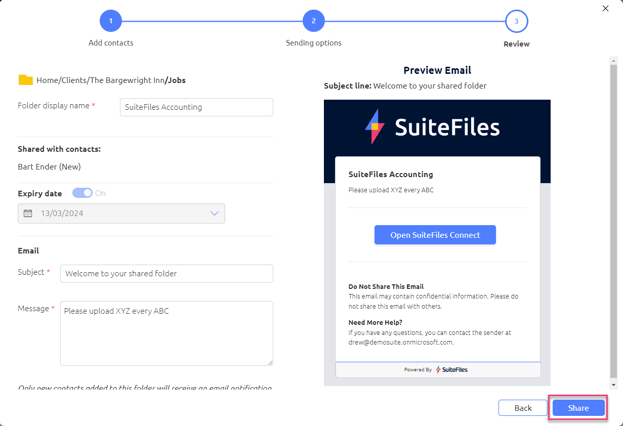
1. You can review all completed fields and get a preview of the email your client will receive. Select Back if you wish to amend any fields.
2. The Share button will send the email containing the connected folder link to your clients.