In this article:
Before getting started
There are a few considerations before getting started with the SuiteFiles x OneDrive integration.
- Files & Folders that have been Archived in the SuiteFiles Web App will be visible in OneDrive.
- Files & Folders that have been newly created via OneDrive may take some time to appear in the SuiteFiles Web App. If you’re concerned about the length of time it has taken for a new folder or file to appear in the SuiteFiles Web App, please contact us.
- While you are using the OneDrive integration, please refrain from using the SuiteFiles Drive app.
Installing OneDrive
OneDrive is installed on most computers by default. If OneDrive isn’t installed, check with your IT team to get OneDrive for Business, or search online for the right installer for your PC/Mac.
Setting up the OneDrive integration
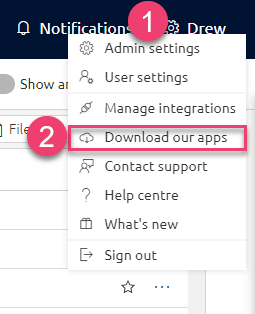
- Click your name in the top right corner and select Download our apps from the dropdown
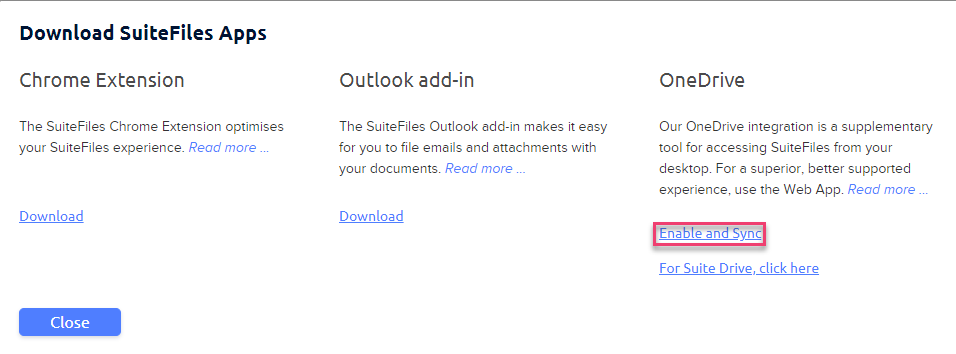
- Click Enable and Sync
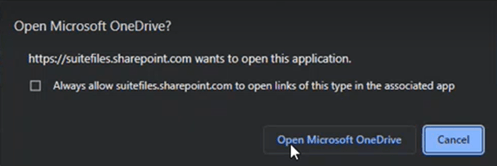
- Follow the resulting prompts on your screen:
- Click Open Microsoft OneDrive.
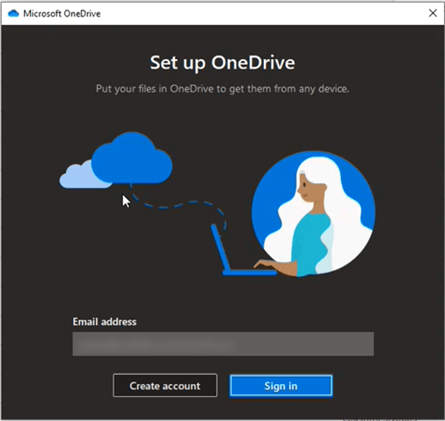
- On the Set up OneDrive screen, your email address should already be entered. If it’s not, enter the same email address you use with SuiteFiles, before selecting Sign In.
- You’ll see several intro screens, read over them and keep clicking Next…
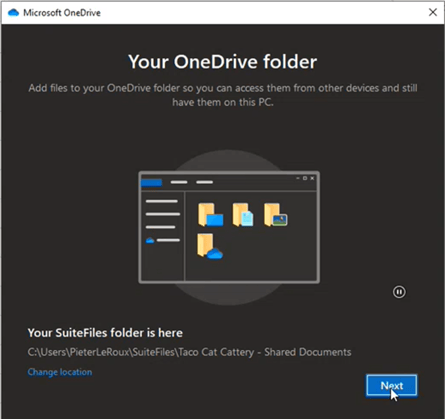
Please note we only support the connection of your SuiteFiles folder. Under "Your SuiteFiles folder is here" on the above screen, you should see the path
C:\Users\[Your Name]\[Your Business Name]\[Your Business Name] - Shared Documents.
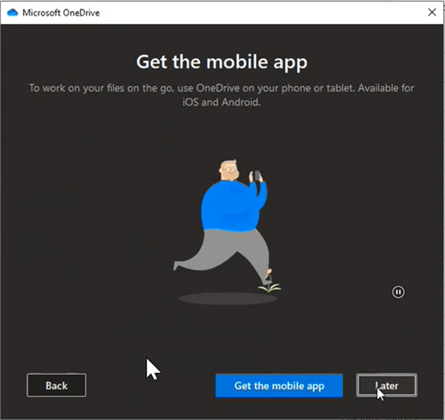
Do not change this location; we only support the connection of your SuiteFiles business account, not personal accounts. - When you get to the Get the mobile app screen, please click Later. We’re not supporting the mobile app at this stage.
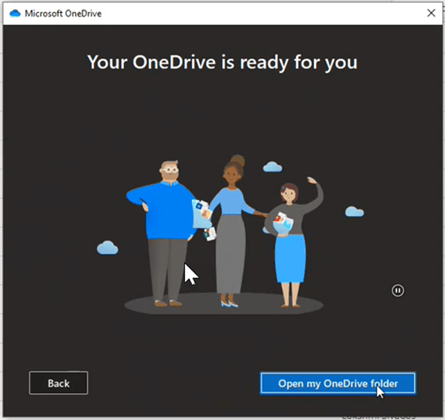
- Click Open my OneDrive folder
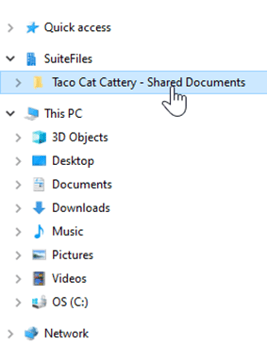
- On the left of your File Explorer, you’ll see a new SuiteFiles option, drop this down to see a folder labelled [Your Business Name] – Shared Documents. This is where you’ll find your SuiteFiles folder structure.
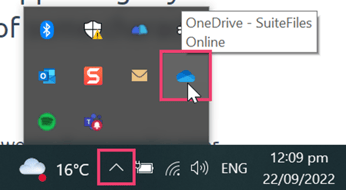
- It will take a while to sync initially. You can check the syncing status by clicking the OneDrive icon in your desktop tray. It may be under Hidden Icons.
Your files are synced will display here if the syncing process has completed.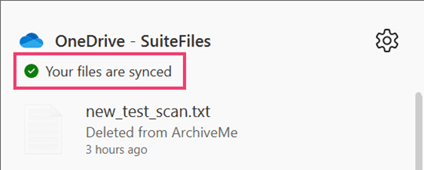
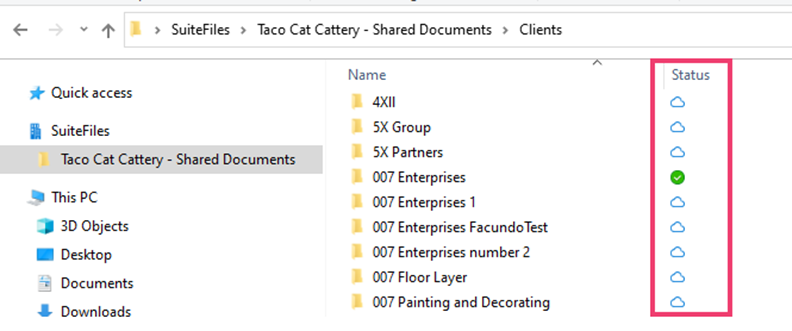
- Each folder and file will have an icon alongside it, under the Status By default everything will be available Online-only as indicated by the cloud icon.
The three statuses are: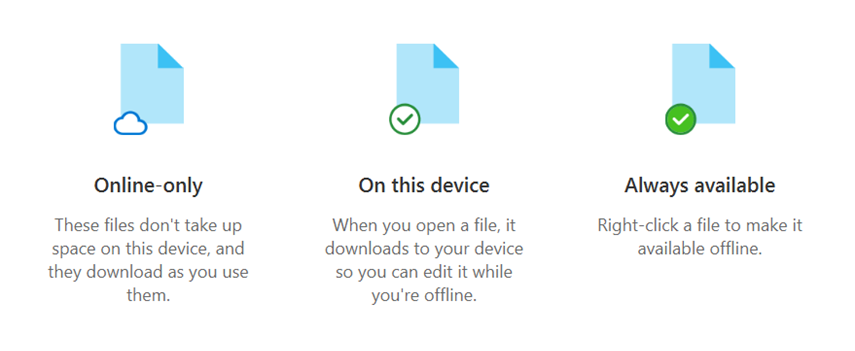
- If you want to have a folder or file available offline you can change its status by right clicking the folder or file and selecting Always keep on this device.
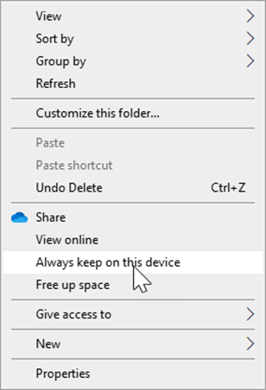
This will turn the icon to the Always available - To remove this option, click Always keep on this device once. This will turn the icon to On this device
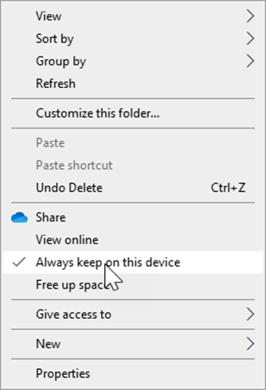
- Click Free up space to return the file or folder to Online-only status
OneDrive settings
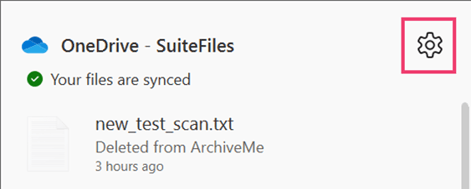
- To access OneDrive settings, click the OneDrive icon in your desktop tray. It may be under Hidden Icons.

- Click the Settings icon:
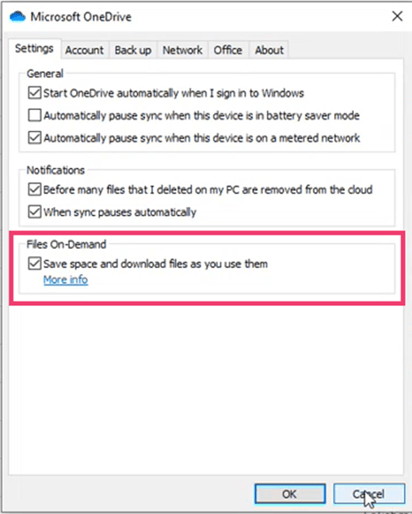
- The Files On-Demand option should be checked by default. This will ensure not all files are downloaded, and instead, only as you use them:
Uninstall SuiteFiles Drive
If you've been a SuiteFiles Drive user, and ready to make the switch to the OneDrive integration, you can uninstall SuiteFiles Drive following these steps.