We've made a number of updates to the document signing process in SuiteFiles. Read this article to learn about each of these changes in detail.
In this article
Step 2: Preparing the document
Overview
Our latest signing update includes a new look and feel plus the following key changes:
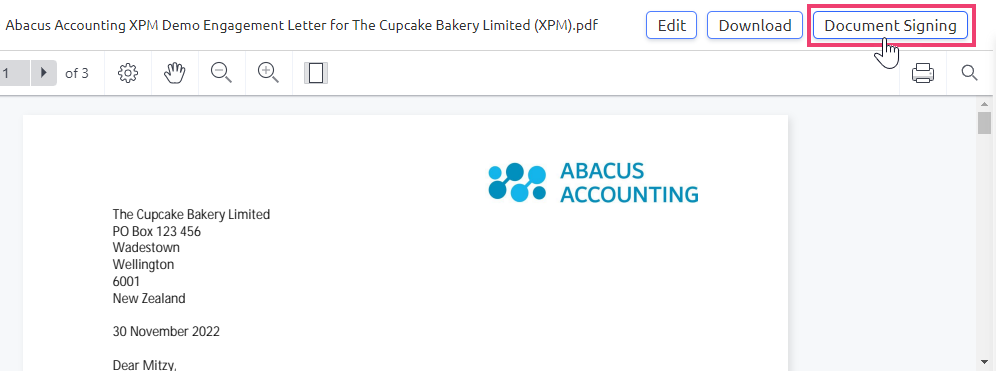
- You'll notice that the Document signing drop-down option has been replaced by a button on the far right of your PDFs. This button has replaced the previous Sign & Save and Multi-sign options.
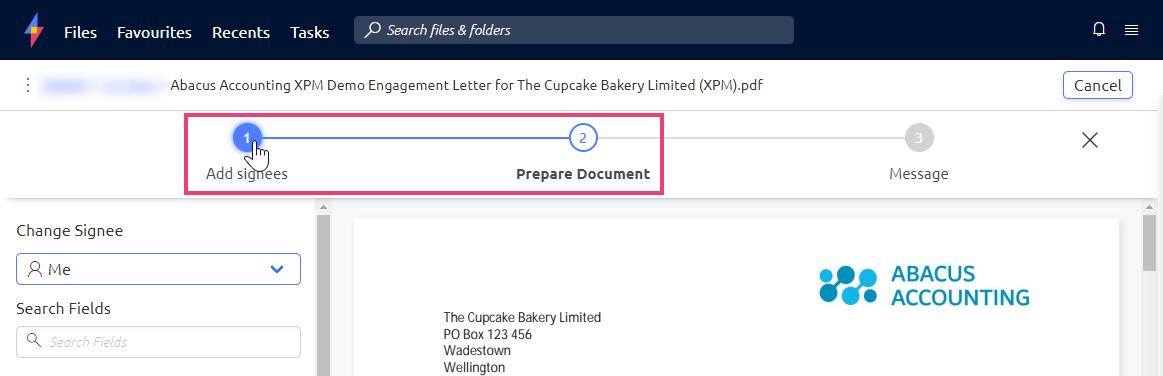
- We've broken down the signing stages into three steps: 1: Add signees, 2: Prepare Document and 3: Message

- If you're a Sign & Save user, you'll need to brush up on the new process here for signing and saving your own documents in SuiteFiles.
- You can now send a document for signing to multiple people who use the same email address. You'll just need to enable Two-factor authentication for all signees and add a different mobile number for each person.
- At any step you can go back to a previous step and make changes without any of your edits being lost.
But wait there's more! 👇 Keep reading to learn about the rest of the changes in this latest signing update.
Step 1: Adding signees
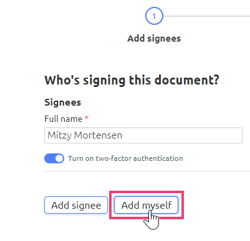
- Once you've selected the Document Signing button from any PDF in the SuiteFiles Web App, you start adding signees.
- Enter your first signee by typing their name into the Full name field.
If you're connected to an integration (e.g. Xero Practice Manager, WorkflowMax or MYOB Practice Management/GreatSoft) the matching contacts will appear in the drop-down, with the associated icon. You can select one of these contacts.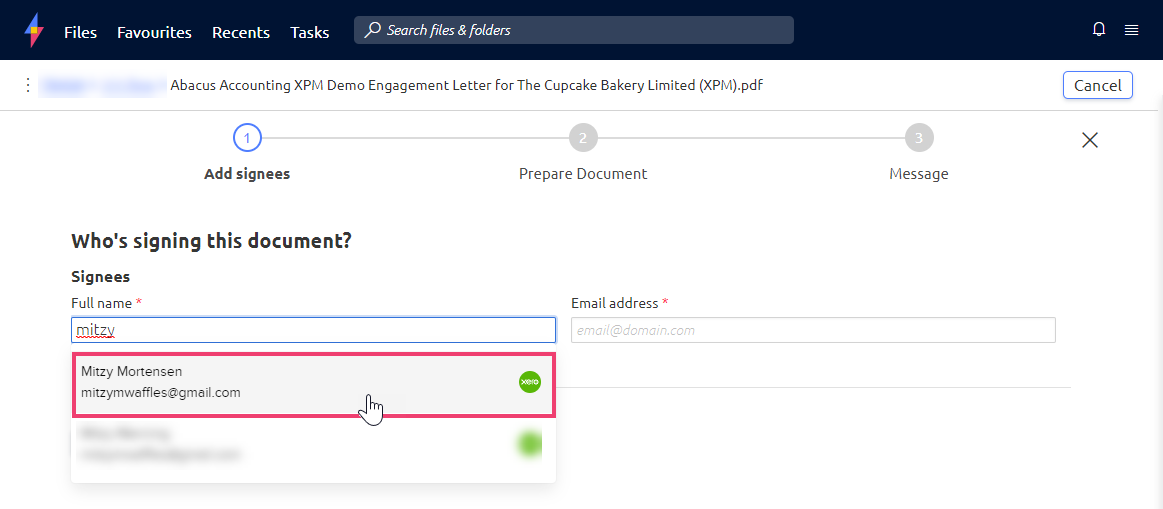
If their email address is stored in the integrated app, the Email address field will auto-fill.
Otherwise simply continue typing the signee Full name, then enter their Email address. - You can now enable Two-factor authentication for each signee. This will send an SMS code the signee must enter before they can view the document for signing.
If Two-factor authentication is required, toggle Turn on two-factor authentication on (blue indicates the field has been toggled on, grey is off).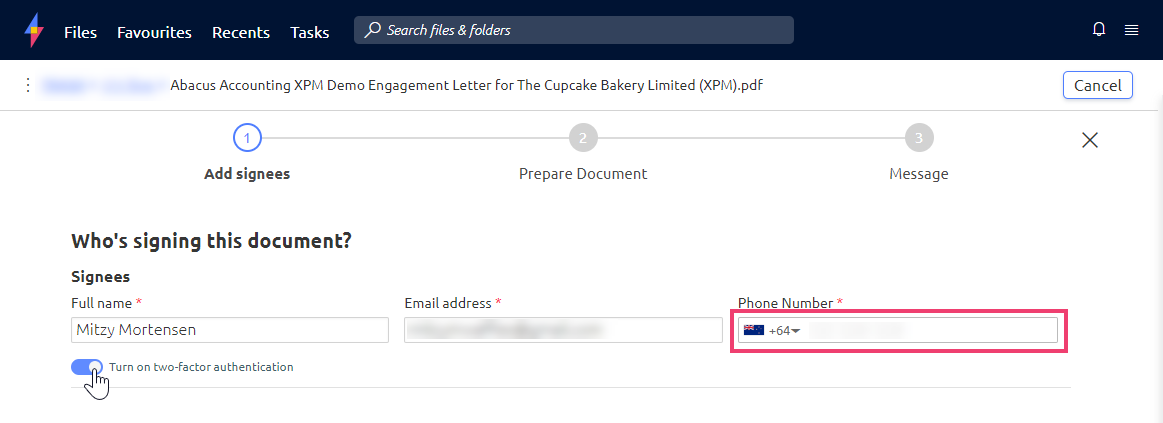
If their mobile number is stored in an integrated app, the Phone Number field will auto-fill. Be sure to select the correct Country Code from the drop-down. Available Countries are Australia, Canada, Ireland, New Zealand, South Africa, United Kingdom & United States. - If you need to add additional signees, click the Add signee button and follow the same steps above to enter their details.
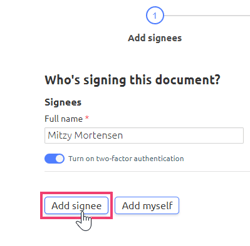
- If you need to add yourself as a signee, click the Add myself option.
- If only you need to sign the file:
- Once you've added yourself, click Next
- Add your signing fields, then click Finish
- You won't receive any emails for self-signed documents.
This is the new process to follow if you've previously used the Sign & Save feature.
- Click Next to be taken to the Prepare Document step.
Please note: If you need to add any CC recipients, please note that this field has moved to the third step under Message.
Step 2: Preparing the document
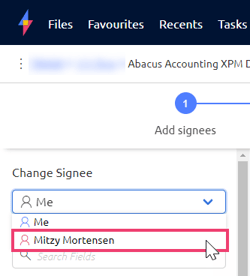
- Any signees added in step 1 will now be available to place signature fields for.
- If you've added yourself and others to the document, you'll place your own fields first. Select your other signees from the Change Signee drop-down.
For signing placement tips see Tips for signing field placement, including how to copy and paste fields. - We've added a Search Fields option so you can easily look up signing field names.

- You can click back to the Add signees step if you need to edit, add or remove signees. The changes on the Prepare Document step will be retained.
Step 3: Adding a message
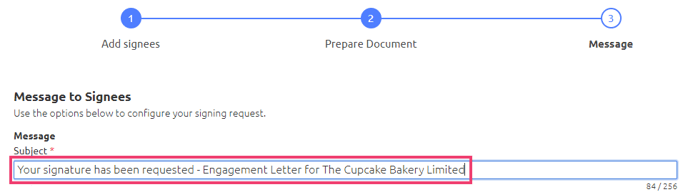
At this step, you can edit your subject line & message, set an expiry date, reminders, add CC recipients and select whether to send the final signed document via a link or as an attached PDF to the email. Here's the breakdown of the key updates for this section:
- You can now set the Subject line for the first email that your signees receive. This will default to "Your signature has been requested". You can replace this with your own custom subject line.
⚠️ You can include part of the file name here but we encourage you to take the necessary steps to protect your signees' details. Do not include any personally identifiable details in your message subject line such as names and other confidential information.
Please note that only the first message's subject line can be customised. We'll have some additional updates to signing emails available in a future update 😍.
- There's now a character limit displayed below the Message field; the limit is 1024 characters.
- When Expiry date is toggled on, the document will be set to expire 30 days from now. You can select a different expiry date by typing one in, or selecting one from the calendar drop-down.
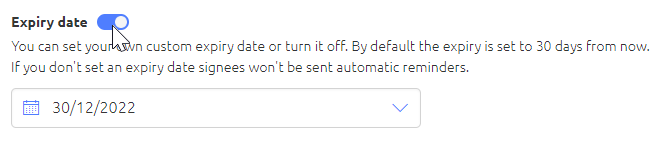
If you toggle this off, the expiry date will default to 365 days from now, and signing reminders cannot be set for this document.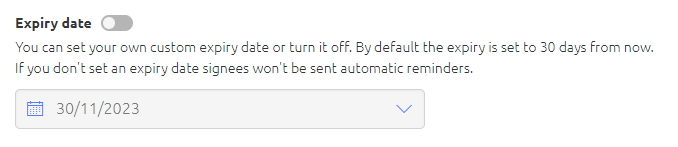
- Reminders can be set to send automatically on days 7, 3 and/or 1 prior to expiry.
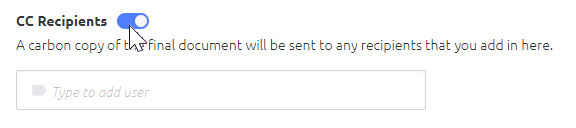
- CC Recipients has been moved from the Add signees stage to this stage. Toggle on if you'd like to add someone who doesn't need to sign the document, but needs a copy of the final signed document.
NB: you can now look up contacts from an integrated app.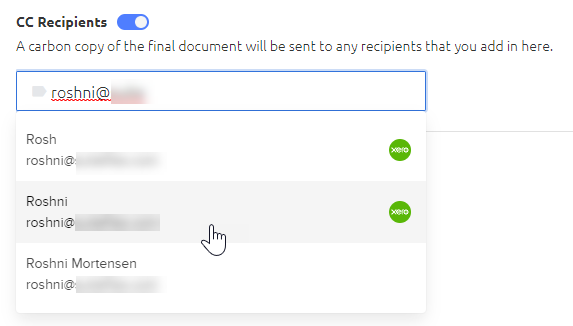
If your CC recipient is not loaded as a contact, you will see a 'There are no items' message as you type. Continue typing the recipient's email address and press Enter on your keyboard to bypass the drop-down. - You can click back to the Add signees step if you need to edit, add or remove signees, or back to the Prepare Document step to update signee fields. The changes on the Message step will be retained.
- Click Send to send the document signing request to all signees.