We've relocated and refreshed security groups and user permissions, as well as introduced a new Billing admin user role in our latest update. If you don't have the update yet, you'll receive it soon!
In this article
Security groups
You can apply permissions on folders to restrict which users can access the folders and files within a folder. This access can be restricted to read-only so no files can be deleted or edited and the access can also be completely removed so the user can't see the folder or it's contents.
To apply these permissions you'll need to create a security group first, then apply one or more groups in folder permissions.
Please note: Only SuiteFiles administrators have the ability to manage and set folder permissions.
How to create a security group
- Click your user name in the top right corner of the SuiteFiles Web App
- Select Admin settings
- Click Security groups
- Click the Create Group button on top right of the screen

- Type the name for your security group in the text box and click the Create button
- To add users to the newly created group, click the cog icon to the right of the group name and select Add user
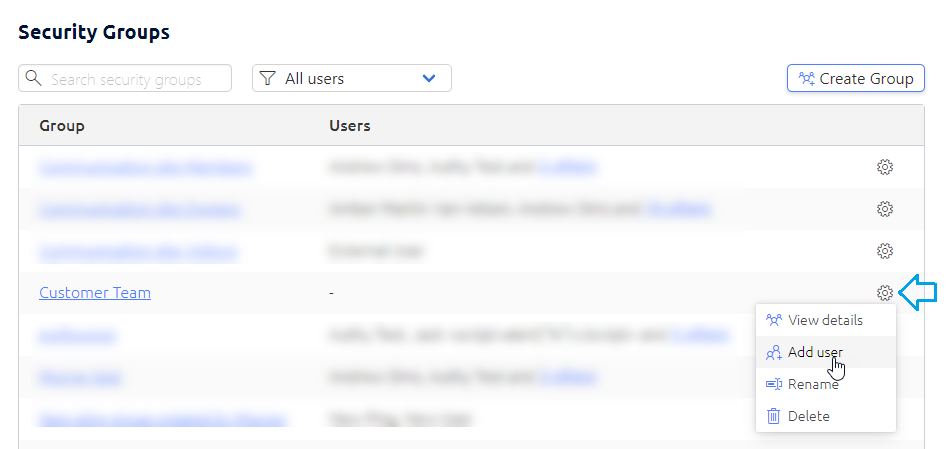
- Alternatively, click the group name then click Add users
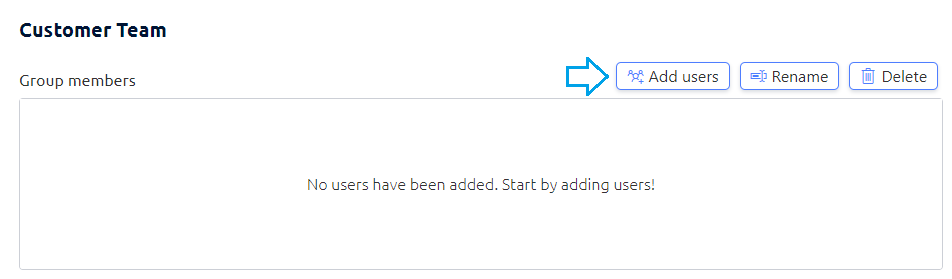
- Type in the user's name and select their full username from the list that appears below. Repeat this step for each user you'd like to add to the group

- Click the Add button. You're now ready to apply this security group to folder permissions. For steps on applying a security group to folder permissions, click here.
User permissions
You can manage your team's ability to access file and folder templates, delete files and folders and manage your users by enabling user permissions. You can also set someone up as a Billing administrator, giving them access to view your account and billing details.
- Click your user name in the top right corner of the SuiteFiles Web App
- Select Admin settings
- Click Users
- Click on the User you'd like to update permissions for
- Scroll to the Permissions section
- If you'd like to give the user all permissions, select the Full administrator access option
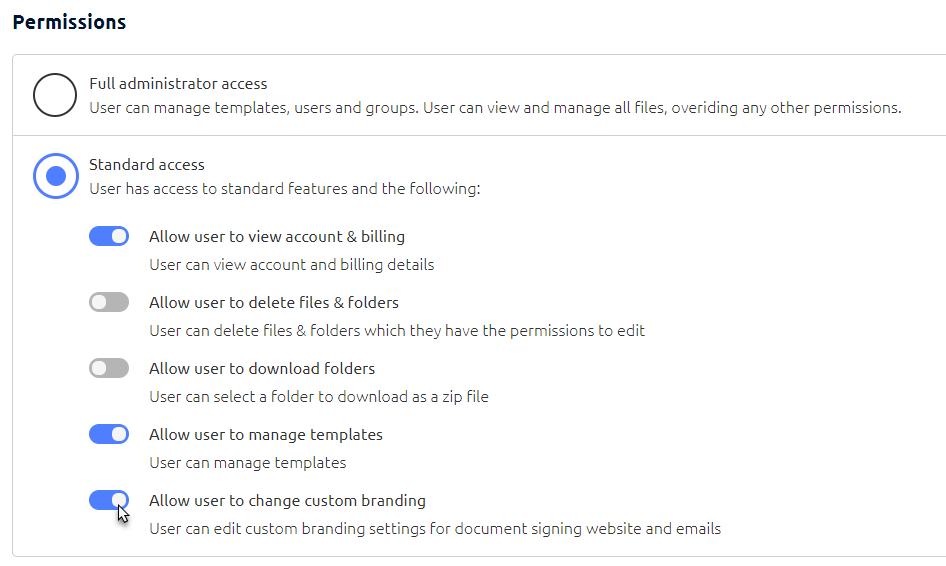
This will add the user to the Team Site Owners group making them a SuiteFiles administrator and provide them permissions for everything in SuiteFiles. Please note that any folder permissions previously set won't apply to SuiteFiles administrators. - If you'd like to give the user standard permissions, select the Standard access option. You can also toggle additional user permissions for Standard users. These include:
- New! Allow user to view account & billing will give the user access to view your account & billing details in SuiteFiles, via the Admin settings screens.
- Allow user to delete files & folders will allow the user to delete files and folders if they have the edit folder permission.
- Please note: due to file explorer restrictions, these delete permissions will only apply to the Web App. This means all users can delete files and folders through SuiteDrive. However, SuiteFiles Administrators can recover data from the recycle bin.
- Allow user to download folders will allow the user to download folders and the folders' content to a zip file.
- Allow user to manage templates will allow the user to create, edit, rename and delete file and folder templates as well as be able to access the template manager to create categories.
- Allow user to manage custom branding will allow the user to customise your custom branding for SuiteFiles Document Signing.