⚠️ Update notice (November 2025)
This article contains steps for the previous version of the SuiteFiles Chrome Extension.
If you’re setting up or troubleshooting from 20 November 2025, please read our latest guide:
👉 Getting ready for the SuiteFiles Chrome Extension updates (November 2025)
To view screenshots of the new look in XPM, see Using SuiteFiles in XPM after the Chrome Extension Updates (Nov 2025)
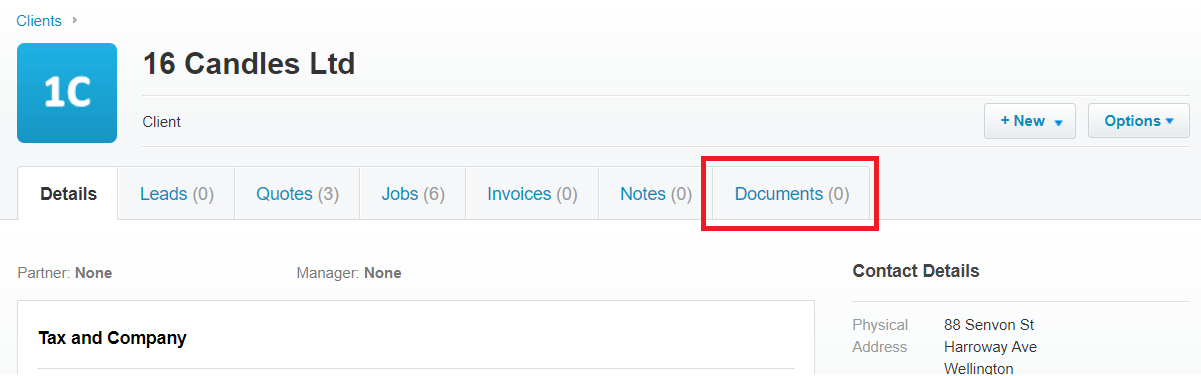
With SuiteFiles and Xero Practice Manager (XPM) integrated you will be able to access your clients documents from SuiteFiles in the XPM Documents tab.
Your XPM Administrator who is also a SuiteFiles Administrator will need to set up your integration between SuiteFiles and XPM before you can start using the integration. For steps, see Setting up the Xero Practice Manager Integration
If you have the Chrome extension installed, you will be able to have a clients, job, and quotes folder automatically created
This guide will step you through:
- How XPM works
- SuiteFiles Documents Tab
- Creating a new Client folder
- Creating a new Job folder
- Creating a new Quote folder
- Archiving Client folders
- Editing Client names
- Printing reports to SuiteFiles
How XPM works
When you’re in the Xero Practice Manager (XPM) and you click on the Documents tab for either a client, a job or a quote the system will search SuiteFiles and look for a client folder with the same name (in the case for a job it looks for a folder structure that is Client Name > Jobs > Job Name; for quotes it is Client Name > Quotes > Quote Name) and then displays the files stored in SuiteFiles in this location.
Manually Selecting the Client Folder
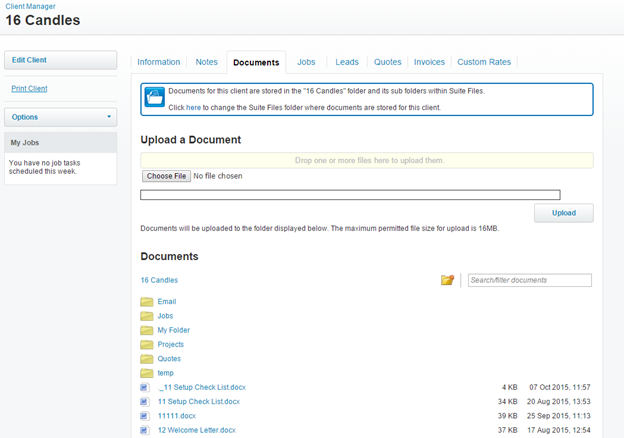
Sometimes the client in XPM doesn’t have a corresponding client folder in SuiteFiles with the same name. To manually set this:
- Click the 'here' link as shown in the screenshot below

- Select the folder you would like to link to from the list
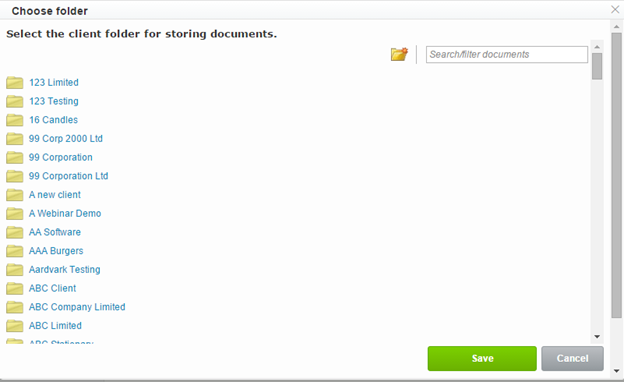
- Click Save.
If you have the Chrome extension installed, you'll enable the following interface and folder prompts in XPM.
SuiteFiles Documents tab
With the SuiteFiles Document tab you can:
- Click New Folder to create a new folder for the client in SuiteFiles, with the option to select a Folder Template
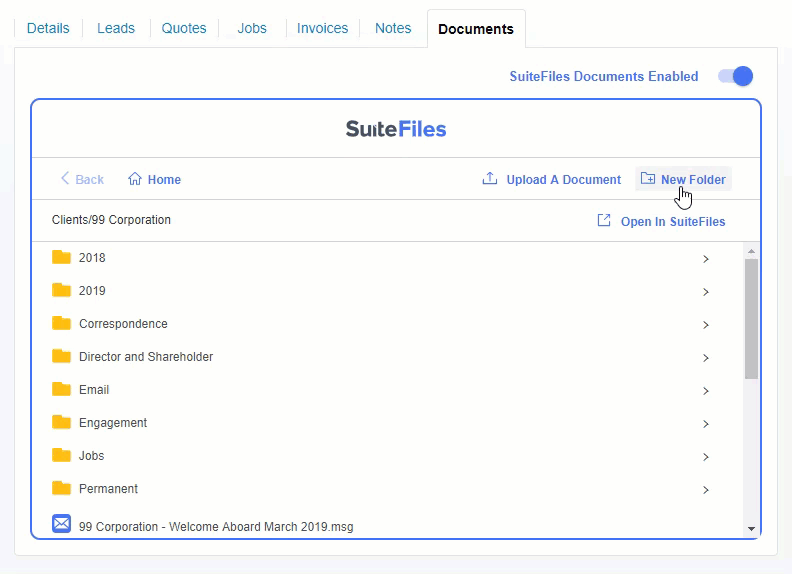
- Upload A Document via File Explorer
- Click Open in SuiteFiles to open the client folder in the SuiteFiles Web App.
- The SuiteFiles Documents Tab can be disabled for your current session by toggling the SuiteFiles Documents Enabled button in the top right corner of the screen.
- To permanently disable the SuiteFiles Documents tab interface, toggle off the Documents Tab Replacement button in the Chrome extension Options following the steps here.
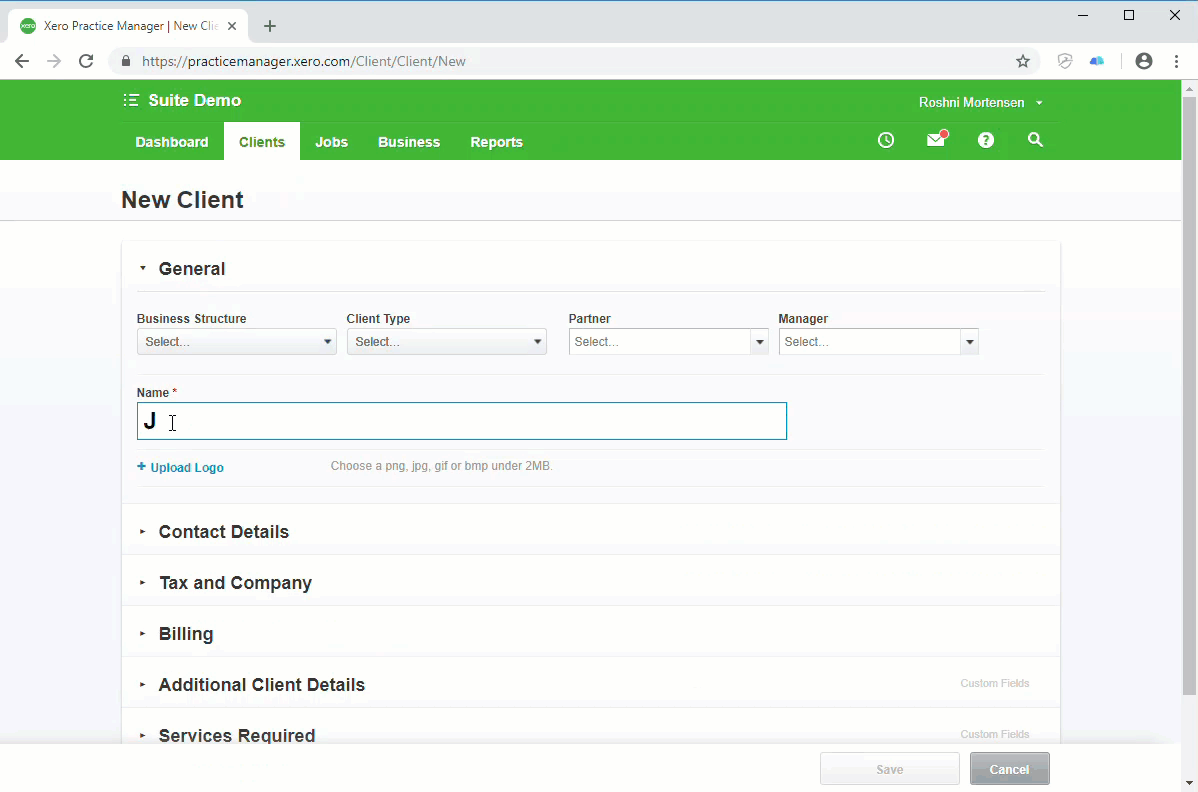
Creating a new Client folder
Once you've created a new client in XPM you will see a prompt asking if you would like to create a corresponding folder in SuiteFiles. You can also apply a folder template that you have created in SuiteFiles to create your standard set of sub-folders for the new client folder in SuiteFiles. Once created in XPM, a link will appear below the Client name. Click this link to be taken to its corresponding folder in SuiteFiles.
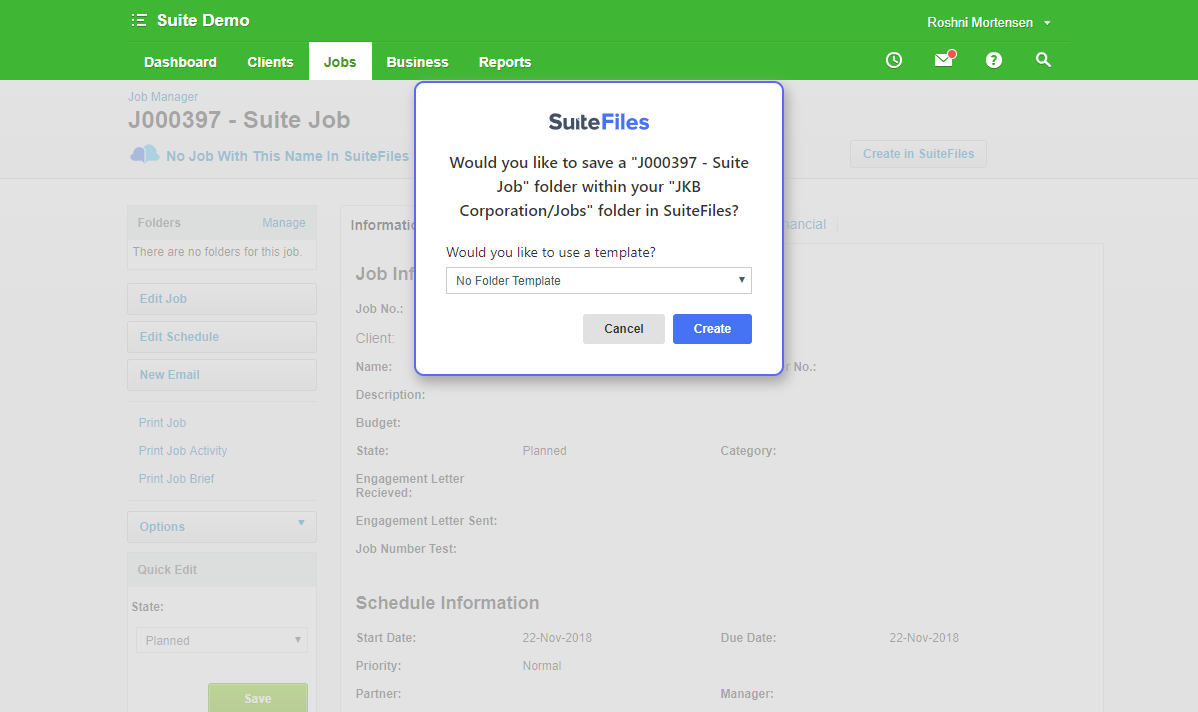
Creating a new Job folder
As soon as you hit the save button on a new job you will be asked if you want a folder created under Client/Jobs for this in SuiteFiles. Once created in XPM, a link will appear below the Job name. Click this link to be taken to its corresponding folder in SuiteFiles.
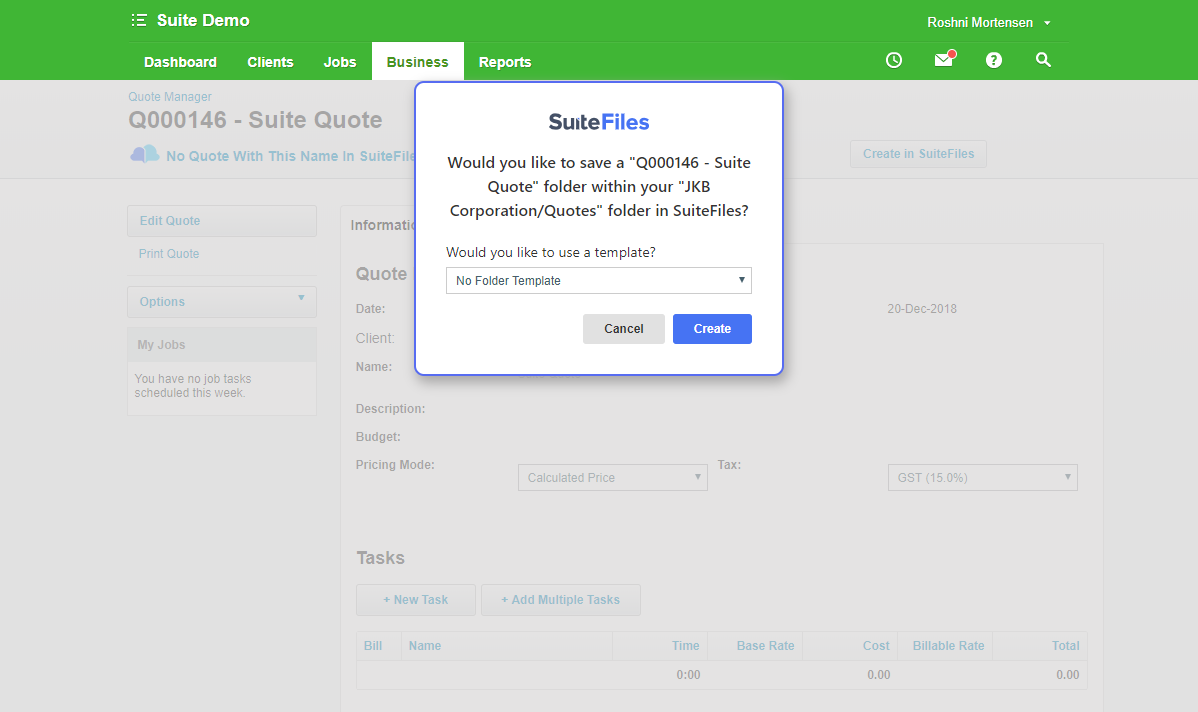
Creating a new Quote folder
When you create a new Quote in XPM and click the next button, you will be prompted to create a folder for that quote under the client in SuiteFiles. Once created in XPM, a link will appear below the Quote name. Click this link to be taken to its corresponding folder in SuiteFiles.
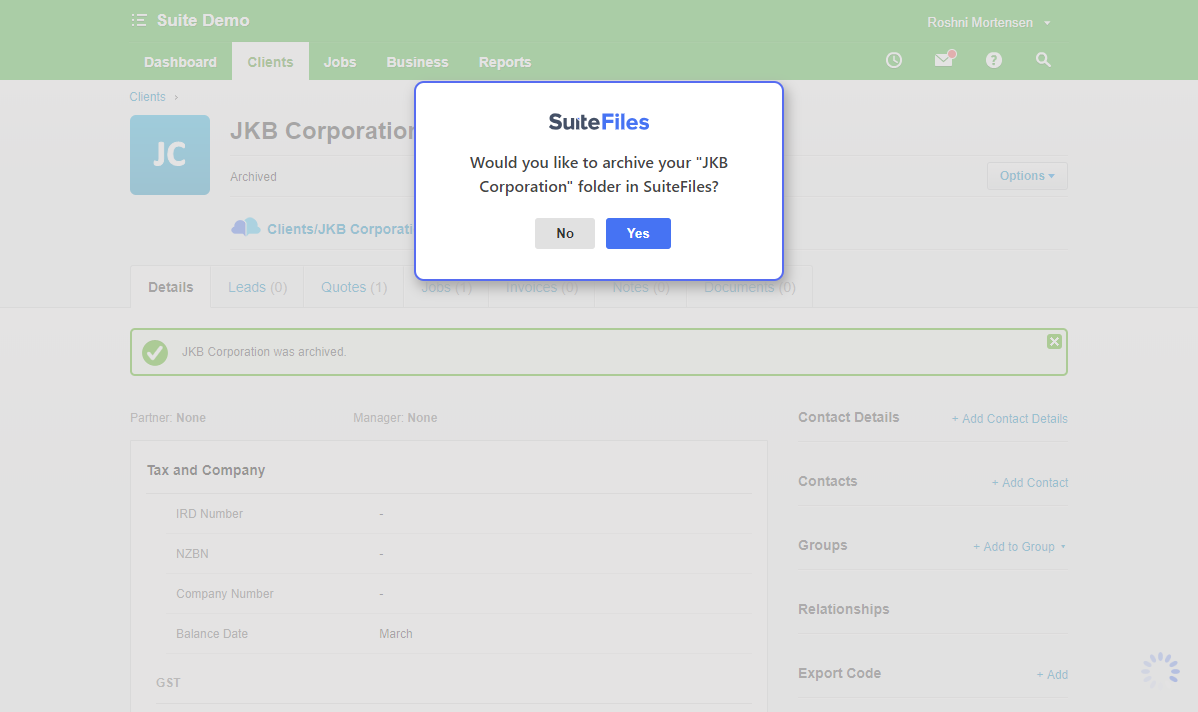
Archiving Client folders
When you archive a client in XPM you will be asked if you'd like to also archive the client in SuiteFiles. This will also work when restoring the client in XPM; the client folder will be unarchived in SuiteFiles.
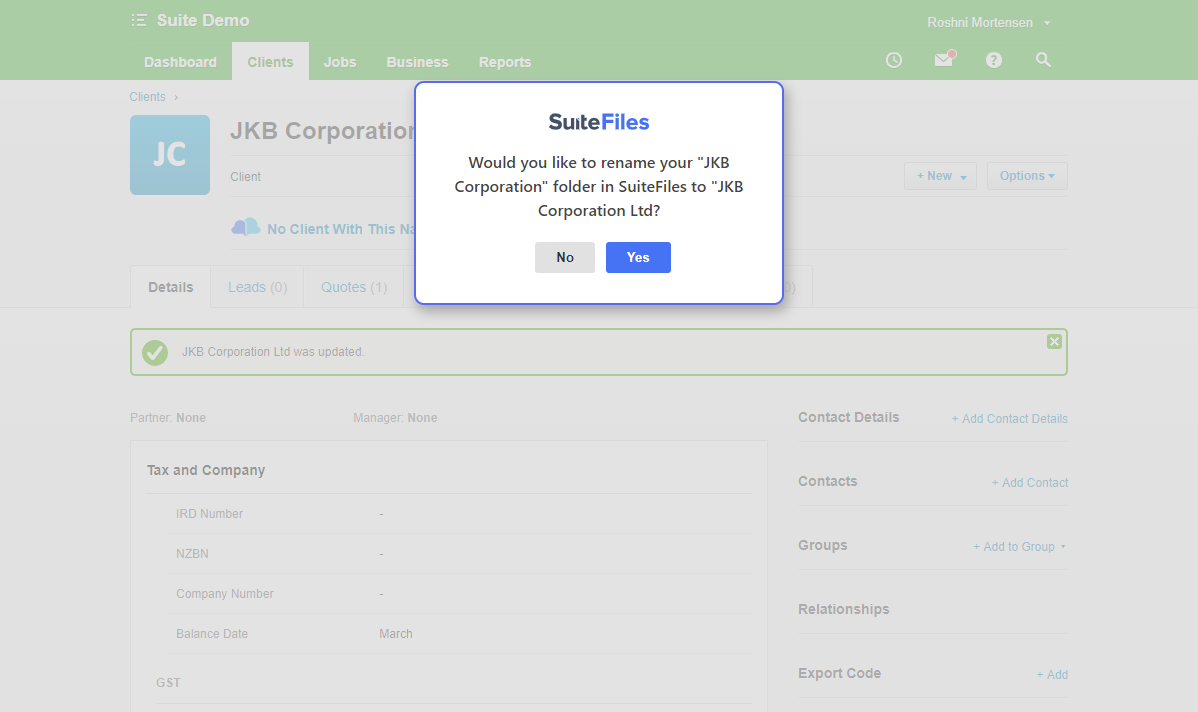
Editing Client Names
If you edit a Client's name in XPM you will be asked if you would like that client's name in SuiteFiles to also be renamed:
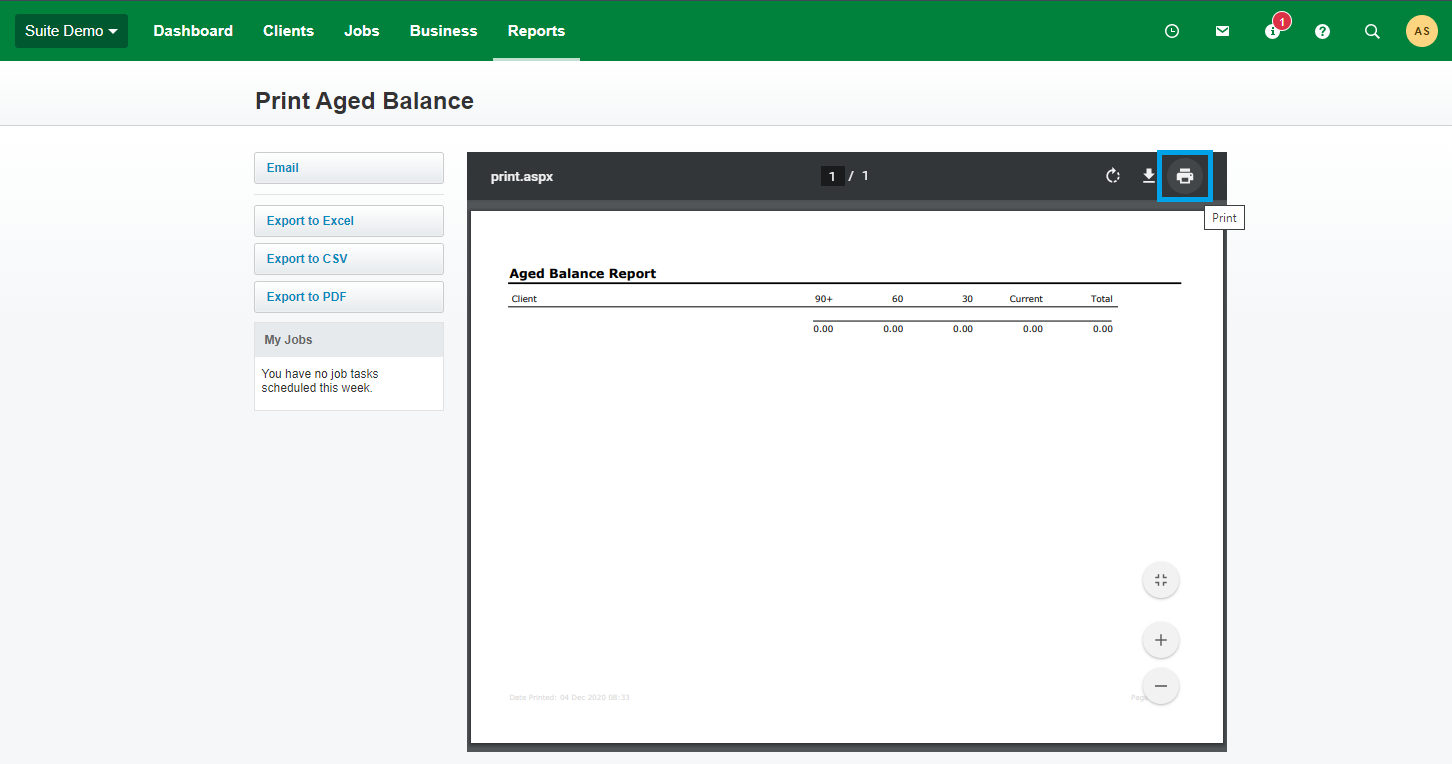
Printing reports to SuiteFiles
To Print a report from XPM to SuiteFiles, select the print button on the top right corner:
Select the SuitePrint option from the Destination Dropdown. Please note, if you cannot see this option, you will need to make sure the SuiteFiles Chrome Extension is enabled. If you're not sure how to check this, please follow these steps:
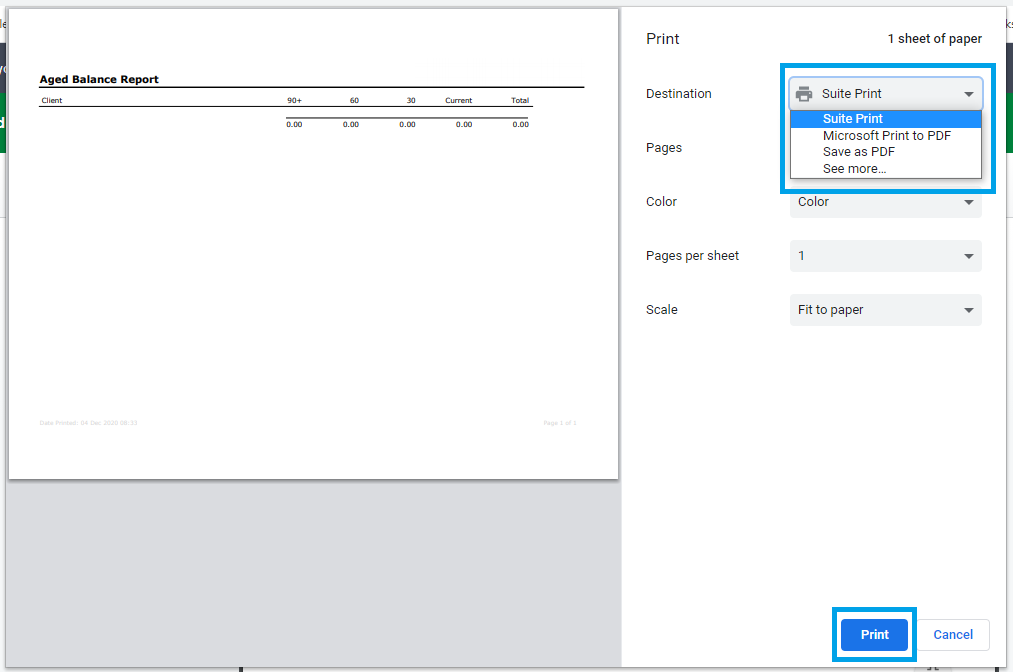
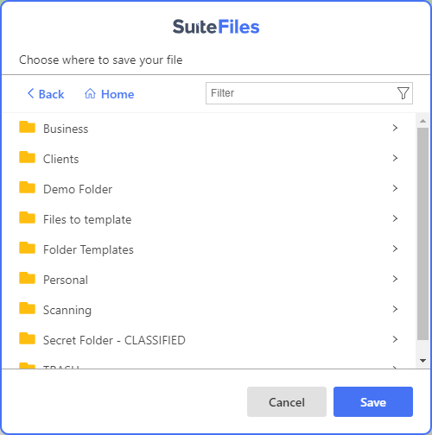
On the next screen, choose where to save your file by navigating through your folder structure, then press Save.